How to Propagate Kalanchoe Plant? | Kalanchoe Plant Propagation! (4-STEPS)
Growing Kalanchoe Plant From Their Leaves & Cuttings Is Very Easy & Simple. But For a Sucsessful Kalanchoe Plant Proagation, You Must Need Some Important Things To Follow. So Lets Know How To Propagate Kalanchoe Plant Step By Step.
What are Ways to Propagate Kalanchoe Plant?
Kalanchoe Plant is an Easy To Grow Plant & You Can Propagate it Either By Their Leaves, Or You Can Use Their Younger Branches To Make a New Plant.
What is the Best Time To Propagate Kalanchoe Plant?
The Best Time To Propagate Kalanchoe Plant is When The Temeperture is Very Normal. Not Too Much High & Not Too Low. That Means You can Propagate Kalanchoe Plant In The Start of Winter Days, Or As It is a permanent Plant, You Can Also Propagate it in The Spring Days.
If The Temperture Goes Upto 25C, The Leaves May Get a Fungal Attack & Turns Like This. You Can Grow Them in Whole Winter Days, But Try not to Propagate kalanchoe Plant in Hot days Of Summers.
How to Propagate Kalanchoe Plant?
You Can Propagate Kalanchoe Plant By Just Following These 4 Steps…
1-Preparing Soil mix:-

The Another Thing in Kalanchoe Plant propagation is The Soil Mix. Soil Mix Plays a Really Big Role To Keep The Cuttings hydrated, So Make Sure Your Soil mix is Loose & Well Draining, Because To Much Moisture In The Soil Can Result Such Type of Blackish Leavers.
I am Using This Loose Soil Mix, It’s also Linked Here To Buy, It Works Really Well Specially To Grow Cuttings. OtherWise You can also Make a Good Mixture At Home, Complete Guide On That is also added Here.
2-Taking Cuttings & Leaves:-

For Taking The Cuttings, You Have to Choose Some Mature Branches & Cut Them With a Sharp & Clean Cutter. So This is The Branch, We also Have To Remove These Flowers, Otherwise They Will Suck The Whole Power of Your Cuttings.
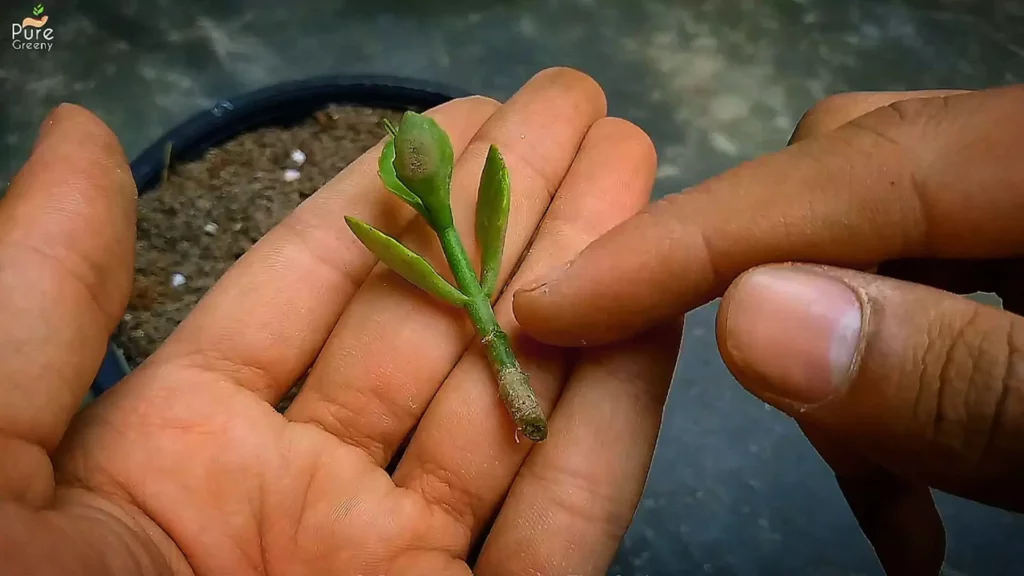
You Can Take Such a Cutting With a Length of 2 to 3 Inches, Remove The Lower Leaves By Just Pulling Them Downwards. While Cutting the Branch, If Your Cutter is Infected, It Can Cause Rotting & Other Fungal Issues, So Make Sure To Clean It With Hydrogen Peroxide, That Works as a Disifectant, Its Linked Here To Buy.
3-Putting Them Into The Soil:-
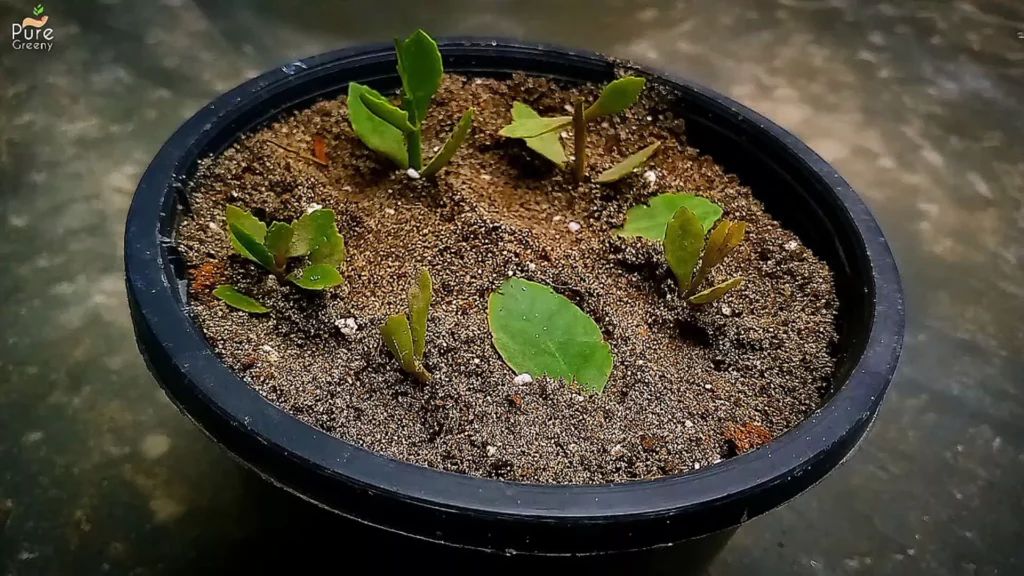
After Taking The Cuttings Just Slide Them into The Soil, Around an inch Deep.

You Can also Use These Leaves To Propagate Kalanchoe Plant, Just Place them Over The Soil. For The Leaf Propagation Of Kalanchoe Plant, Choose Big Size & Older Leaves, & Try To pull Them Downward To Get Them Out Of The Plant. It Helps To Protect The Tissues Of The Leaf.
4-Watering & Placing in a Shade:-

Now We can Add Some Moisture, Here You Need To Add Only a Small Amount of Moisture, Because Water Logging can Cause Serious Damage, That We Will also See In a While. Keep This Pot in a Bright Shade, Away From Direct Sunlight. & Water Carefully.
After 10 Days…
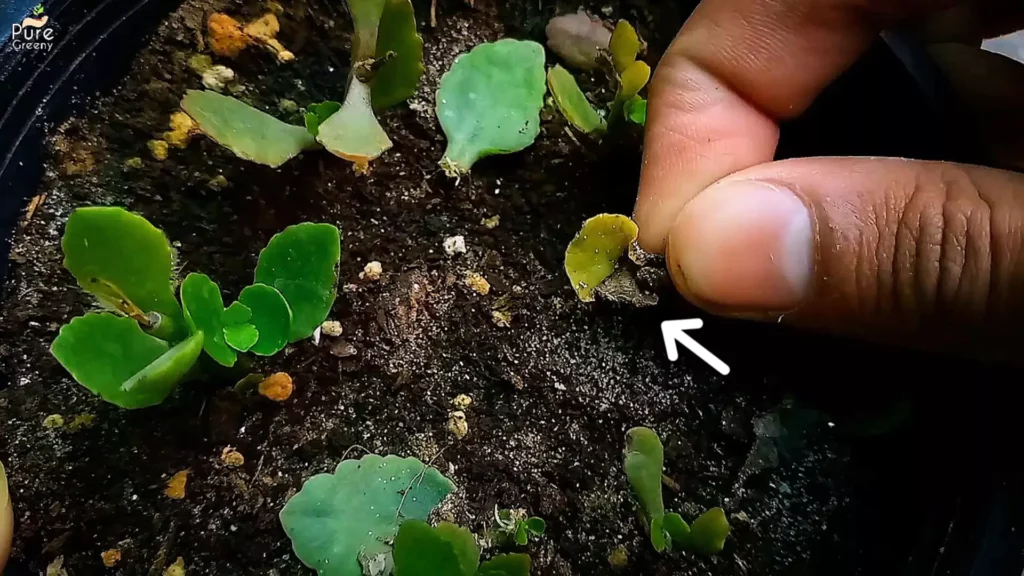
After Around 10 days, Here You can See Our Cutting have New Growth. But The Leaves We Tried To Propagate Are Turning Black. This is Because The Temperture Here is Now Rising Quickly, & This Is Not Good For Our Cuttings.
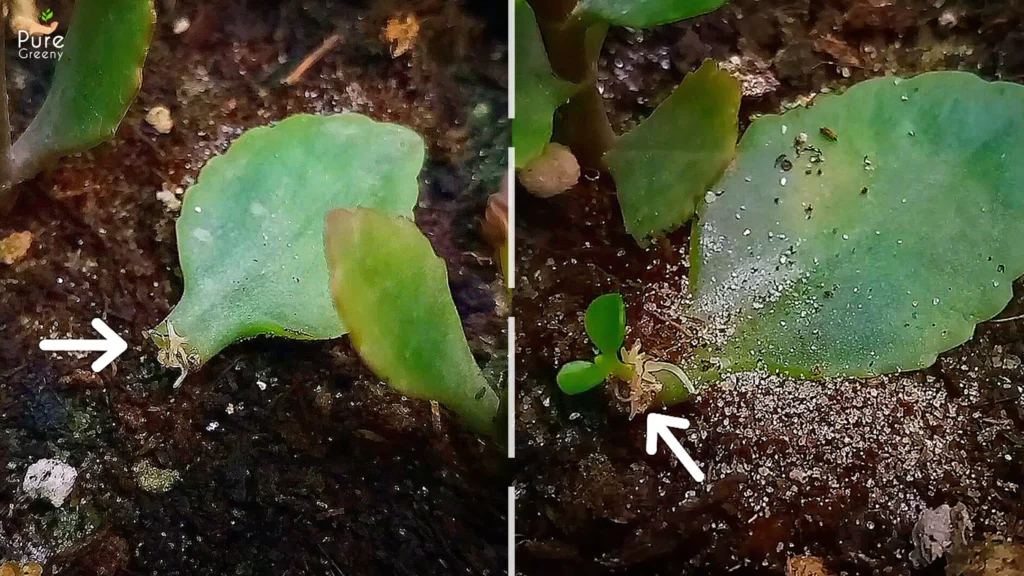
Look at This Leaf, It have Some Roots, & This Another kalanchoe Leaf have a baby Kalanchoe. At This Stage Water Very Carefully.
After 18 Days…

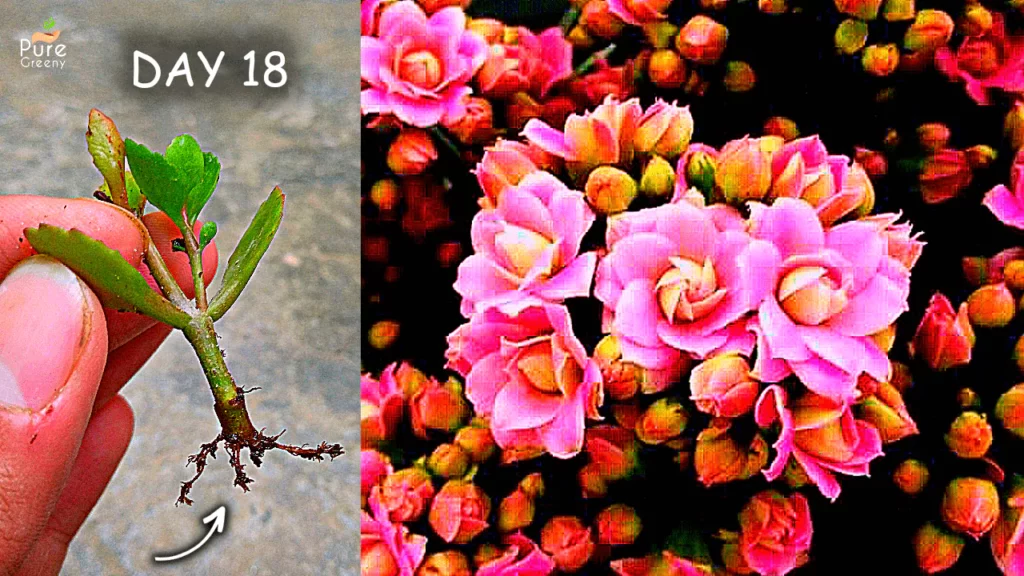
After 18 Days, This is the Result Our Cuttings have grown a Little more. It Time To Check Their Roots, Remove The Soil Very Carefully.
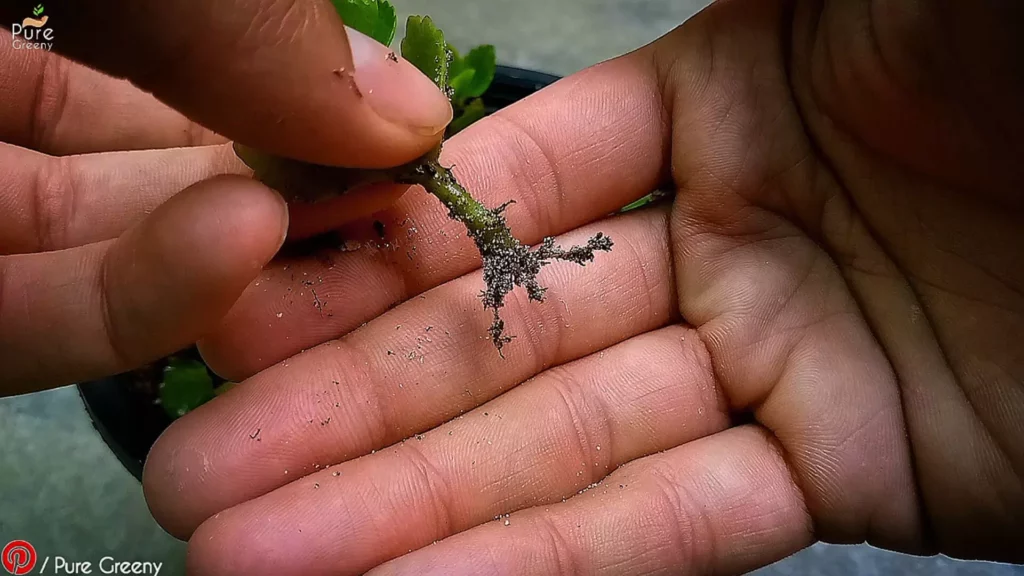
So Here We Have Some Roots, Kalanchoe Plant is a Succulent, Therefore They Have More Growth & Less Roots. Its Natural, Our Cutting Is Sucsessful, Now We Can Put Them In a New Container.

After Extracting All Our Cutting, This is How They Looks Like. This Is An Off Season Propagation, The Results In Winter Days Could Be Much Better Than These.
The Leaf propagation can Be Done, But The Winter is The Best Time For That. Keeping the Soil Moist As Well As Well draining at The Same Time, Could be Much Easier in Winters, That Is Very Important for The Leaf Propagation.
Putting them in Separate Pots:-

For Transplanting These Cuttings take a Well Draining mix, & Water First.

After That You can Put Your Kalanchoe Plant in To it. slightly Press the Soil & That’s It.

Place It in a Shade away From Sun, So It Can Recover. Once Your Plant Show Signs of new Growth, Then You Can Fertilize It With This Succulents & Cacti Food. Must CheckOut This Guide To Know More.
