8 Easy Steps For Hibiscus Plant Air layering Technique… (With Updates)

A Successful Hibiscus Plant Air layering Requires a Few Easy Steps, that you can Do Very Easily, after Reading This Post. I will show you The Whole Process, So Keep Reading.
What is an Air layering Technique?
Air layering is a Technique in which We enforce the Hibiscus Plant To Grow Roots From the Middle of a Growing Stem, & after the Rooting, We can cut off the Upper Branch & Plant it Separately. I hope you Got The Idea.
Is It Easy to Propagate Hibiscus Plant By Air layering?
Hibiscus Plant Air layering Is an easy & Simple Technique, & lets the Hibiscus Plant Be multiplied Without any Risk of Failure. But it is Very Important to Follow up on These Steps. So Let’s Know About Them,
How to Air layer Hibiscus Tree? (8 Easy Steps)
1-Seasoning

The Most Important Thing in Hibiscus Plant Air layering is the Right Seasoning. It is always essential to do any type of Propagation within the Season. Hibiscus Plant doesn’t grow all around the Year, & Air layering may not work during the Dormancy Time. So it is so important to follow up the Right Season.
What is the Best Time to Air layer Hibiscus?
So The Best Time to air layer Hibiscus Plant is in its Growing Season, which means You can Do all of this in the Summer Season. & Air layering will go just perfectly if You Do this on Rainy Days.
2-Soil Mix;-

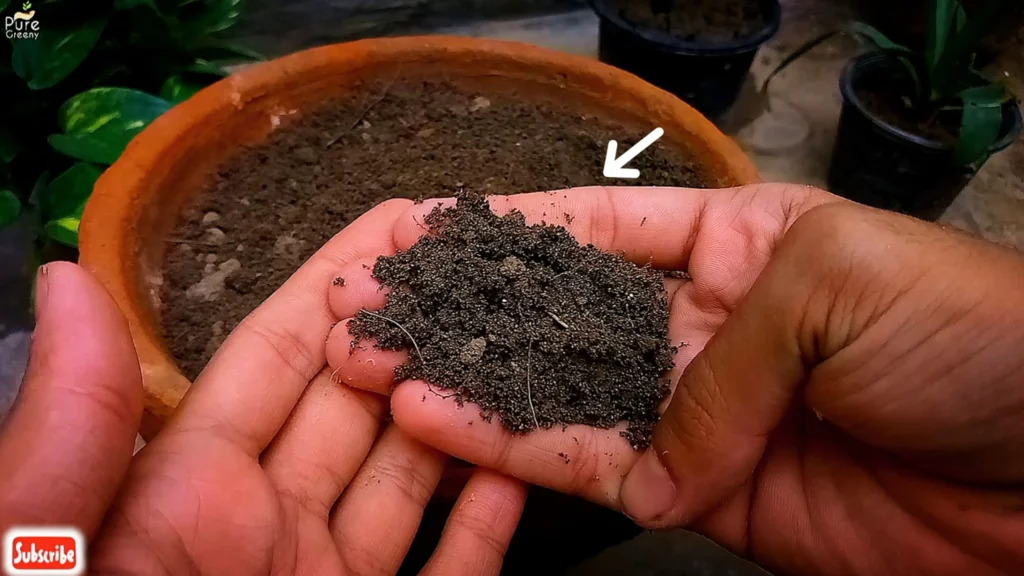
Another Important Thing is your Soil mix, which makes the Hibiscus Air layering Successful. First of all, we have to make a Good Soil Mix, which wouldn’t Cause Branch rotting. Too much water Holding Soil mix can let the Roots Grow, therefore we have to use a Good Soil Mix.
What is The Best Soil mix for Hibiscus?
A Well Draining, Loose & Soft Soil mix Works Well. You don’t need any Fertilizer in the Soil, so you can use a Part of Cocopeat & perlite mixed. Otherwise ready to Use Soil mix is Here. Make the Soil Moist, it’s only a Time Watering, so Don’t Add too much Moisture.
3-Branch Selection;-

Selection of Branch is also Important in hibiscus Air layering. The Thumb rule is to choose a Semie hardwood Cutting, that is Slightly Flexible. Don’t Choose a Thin branch, a Pencil’s Thickness Branch Works perfectly.
4-Make Sharp Cuts With a Clear Cutter / Blade;-

Now the Most Sensitive Step Comes, that is to make Cuts. For a Successful Hibiscus air layering, you should Always choose a disinfected cutter or a Sharp Blade.
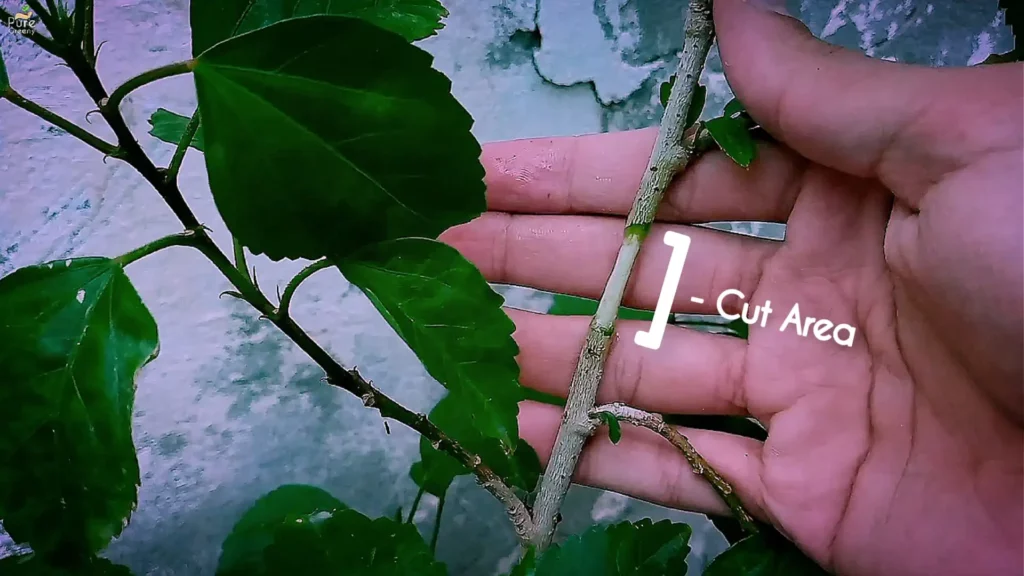
Just remove the leaves From the Branch, & make Two Round Cuts, at least 1 inch apart. Make a Straight cut & Remove the Upper skin of the Stem. While holding the Blade, move it very carefully & Gently.

Don’t make too much deeper Cuts. You have to make the White, woody stem to be visible and remove any green material by scratching. So it’s Done.
5-Tie Tightly;-

Now You Have to wrap the soil Around the Cut, before that you can apply a rooting hormone, or just use an aloe Vera leaf as Your Rotting hormone.

Cover the Soil with Plastic Wrap & tie it Tightly. Make sure your Soil is covering the Whole Branch.
6-Keep the Plant As Normal;-

Just Keep the Plant as Normal as It was Before, you don’t have to do anything. If Your Plant is growing fast, the roots Will come quickly. For that, You can Follow up Hibiscus Plant Care Video.
After 35 Days…..

So it’s About the 34th day of our Hibiscus Plant Air layering & now the Roots are coming up. You can Wait For further Growth of Roots, but I am doing all of this in the Late summer, & after a few days, our Hibiscus Plant will be dormant, so It’s the right time to put this branch in a new Pot.
7-Soaking The Branch In Water;-

So for that, cut the Branch with a Clean Cutter just below the plastic Wrap. After Removing The Plastic Wrap, you have to soak the roots in the Water for 10 to 15 minutes. Till that, Prepare your New Pot With a Good Soil Mix.
8-Plant it & Place it in the Shade;-

The Last thing is to Put this Newly Propagated Hibiscus Plant in the soil & cover it.

Give it frequent Watering, Put this Container in a Shade for a few days, as You find New Growth move it back to a Sunny Spot. These leaves Will turn yellow & fall off, that is a normal thing.
Problems In Hibiscus air layering
Let’s talk a little about a Few Problems, you may face while Hibiscus Plant air layering. Sometimes the plant may not produce any Roots, which is mostly due to a Wrong cut. So make sure your amount hasn’t any green material left, otherwise, it wouldn’t grow Roots.
Seasoning also plays a big role in this, Hibiscus plant doesn’t grow any new Roots in the Dormancy Time, so follow up all of these steps only in the Growing days of the Hibiscus Plant. If Your Soil mix is overly moist, then it can also dry up the whole branch, so Keep that in mind as well.
So it’s all about the Hibiscus Plant Air layering Technique, for any Questions Leave a Comment Below.


